Start with the exact model and manual
Greenstar Original, Gold, Elite, Pro, and Greenstar 5 share a twin-gear concept but not necessarily identical parts, screens, housings, marks, bushings, pressure outlets, or assembly steps. Read the manual for the exact model number before the first cleaning. Keep it accessible and identify which gear is driven, which is free-wheeling, and how their alignment is shown.
Do not assemble from a retailer photograph or another family's video. Similar-looking parts can seat differently, and forcing an incompatible sequence can damage the machine. Confirm voltage, accessories, screen type, and any model-specific safety lock. JuicerPress provides a workflow checklist, while the current Tribest manual remains the operating authority.
Prepare a clean disassembly and drying station
Clear the sink, set out a non-damaging approved brush or supplied screen tool, and reserve a drying area where gears cannot roll or strike one another. Place a bowl or compost container for loose pulp. Protect the cord and motor base from water. If parts are heavy or slippery, move one at a time with dry hands and stable footing.
Arrange the counter in removal order so reassembly is easier to understand. Keep model-specific gears together. Do not stack sharp or toothed pieces where they can damage screens, seals, counters, or hands. A predictable station reduces the temptation to leave wet components in the housing or rush the alignment before everything is inspected.
Finish the batch without packing the pulp path
Feed only approved, prepared ingredients and let the machine move each portion before adding more. Do not force the last handful simply to finish the bowl. As the batch ends, follow the model guidance for clearing the extraction area. Do not add water, utensils, or unapproved material while the machine is running.
Stop for repeated stalling, grinding, leaking, unusual odor, heat, or a pressure outlet that does not behave normally. Unplug before disassembly as directed. Cleaning should not become an attempt to diagnose a damaged or jammed appliance while power is available. Use the manual's jam or reverse procedure and seek manufacturer support when normal steps do not restore safe operation.
Release pressure before removing the housing
The outlet-pressure control creates resistance at the pulp exit. Return or loosen it only by the method and order named for the exact model. Residual compressed pulp can make the housing feel tight. Do not twist, pry, strike, or use tools simply because a part does not release immediately.
Support the housing as fasteners are opened so it does not fall with the screen or gears inside. Keep fingers away from pinch areas and gear teeth. If a component remains bound after the documented release steps, stop and consult the manual or support. More force can turn ordinary pulp resistance into a damaged screen, housing, shaft, or locking point.
Remove the screen and twin gears in order
Note the installed orientation before lifting parts away. Remove the housing, screen or blank, and matched gear pair as the manual shows. Distinguish the drive gear from the free-wheel gear and preserve any alignment reference. Set both on the prepared surface where they cannot roll.
Never mix gears from another model or substitute a single replacement without manufacturer confirmation. The pair works with close spacing and model-specific interfaces. Inspect any bushing, seal, or bearing-contact area identified by the manual, but remove only components approved for routine cleaning. A piece being visible does not automatically make it user-serviceable.
Clear loose pulp before it reaches the drain
Use hands or the approved tool safely to remove large pulp masses from the screen, gear housing, feed throat, pressure outlet, and pulp path. Put fiber and food waste in the designated container rather than flushing a heavy load into the sink. Celery, wheatgrass, greens, ginger, and roots can leave different strands and particles around the assembly.
Do not scrape a screen with metal utensils or improvise a blade between gear teeth. An aggressive tool can deform mesh or damage surfaces. Clearing loose material first keeps wash water useful and lets the brush reach the actual screen openings, recesses, and channels instead of spreading a thick pulp layer around the sink.
Wash the matched gears without damaging them
Rinse each gear promptly using the water temperature and detergent allowed by the exact manual. Brush teeth, cutting points, recesses, ends, and shaft interfaces with the approved tool and direction. Rotate the loose gear by hand only when safely held away from the powered base. Inspect under good light for trapped fibers.
All-stainless gear language does not mean every nearby part is dishwasher-safe, and it does not permit harsh chemicals or abrasive tools. HD twin gears in Original or Gold families may have different construction details from all-stainless Pro or GS5 gears. Follow the model's care instructions rather than transferring a cleaning claim across the lineup.
Treat the screen as the priority surface
Juice passes through fine openings while pulp remains outside, so the screen can hold a thin layer even after it looks rinsed. Brush from every permitted side, move methodically around the full surface, and hold it toward light to identify blocked areas. Pay attention to edges where the screen meets the housing and to any outlet transition.
Use the supplied screen tool when the exact model provides one and follow its technique. Do not enlarge holes, bend mesh, or scrape with a knife. If a screen is cracked, distorted, separated, or no longer seats correctly, stop using it and confirm the proper replacement. A damaged screen is not repaired by tightening the outlet pressure.
Clean the housing, throat, and pressure outlet
Rinse and brush the housing interior, feed throat, pulp discharge route, and pressure-control components approved for removal. Fibers can wrap at transitions and soft produce can coat corners. Openings that appear clear from one side may still hold residue deeper in the path. Use only the disassembly described for routine care.
The pressure outlet deserves deliberate inspection because it controls pulp resistance. Dried residue can make later adjustment difficult. Do not lubricate, modify, or soak mechanisms unless Tribest specifically directs it for the exact model. Reinstall springs, knobs, caps, or seals only in their documented orientation and never replace a food-contact component with a generic look-alike.
Keep the motor base dry
Unplug the machine and wipe the exterior with the permitted damp cloth. Do not carry the motor base into the sink, run water over it, or let a wet cord or plug rest near the washing area. Clean splashes promptly without pushing moisture into vents, controls, shafts, or seams.
Inspect the drive interface for residue only as the manual allows. Do not insert tools into the motor body or remove covers intended for service. If liquid reaches an electrical area, the machine is dropped, the shaft appears damaged, or controls behave abnormally, stop and contact appropriate support rather than testing it with wet parts attached.
Air-dry every component before assembly
Place gears, screen, housing, pressure parts, containers, pusher, and approved removable pieces on a clean drying surface with airflow around them. Do not trap moisture by nesting a screen inside a wet housing or closing the assembly for storage. Turn parts when necessary so hidden recesses and ends can dry.
Drying time is also inspection time. Check for pulp, blocked mesh, staining, cracks, deformation, loose surfaces, damaged seals, unusual wear, or parts that no longer match the diagram. Do not use abrasive whitening methods or unsupported sanitizing chemicals. Cosmetic color is less important than clean, intact, correctly fitting food-contact surfaces.
Reinstall the drive and free-wheel gears correctly
Identify each gear and orient the alignment marks exactly as the model manual shows. Seat the drive gear on its interface without forcing it, then place the companion gear so the pair meshes and rests at the expected depth. Both should sit squarely. Resistance or uneven projection indicates that the alignment needs to be checked, not pushed harder.
Keep fingers clear of teeth and do not rotate the powered shaft by energizing the machine during assembly. A gentle manual check should occur only if the instructions call for it. The Original, Elite, Pro, GS5, and Gold families can use different gear construction and marks, so a remembered sequence from one model does not replace today's diagram.
Seat the correct screen and housing
Choose the fine screen, coarse screen, homogenizing blank, or other accessory only for an approved task and exact model. Position it around or beneath the gears as documented, align tabs or channels, and install the housing without pinching or displacing the screen. Fasteners should engage normally and evenly.
Do not mix an accessory from another Greenstar family because its name sounds similar. Confirm part number and compatibility. If the housing will not close with normal pressure, remove it and inspect gear seating, screen orientation, seals, pulp residue, and attachment choice. Forcing the lock can hide a wrong alignment until the motor starts.
Set outlet pressure for the next ingredient
Install the correct pressure-control component and return it to the starting position specified for the planned ingredient and screen. Do not assume the tightest setting produces the best result. Firmer produce, leafy material, soft fruit, and non-juice blanks can require different handling, and exact guidance varies by model.
The outlet must allow pulp to leave without an uncontrolled backup. During the next batch, observe normal discharge and adjust only as allowed. Stop if pulp does not exit, the housing strains, juice leaks from an unusual place, or the motor repeatedly stalls. Pressure control refines a compatible process; it does not make an overloaded or wrongly assembled machine work.
Complete a dry pre-use check
Before adding produce, confirm that gears, screen, housing, outlet pressure, feed chute, safety tray, juice vessel, pulp container, and pusher are the exact clean parts for the model and are fully seated. Verify that the unit is stable, the cord is dry, and no brush, cloth, loose part, or hand remains near the feed or discharge path.
Power the machine only according to the manual and listen for the normal unloaded sound. Stop immediately if the gear pair binds, the housing moves, parts grind, or the control behaves unexpectedly. A short dry check is not permission to run the machine without purpose or beyond its limits; it is the final opportunity to catch an assembly mistake before food enters.
Store parts by model family
Keep screens, blanks, pressure components, gears, tools, and manuals together by exact model. Label storage when more than one Greenstar family is present. Protect the gear teeth and screen from impact and keep small parts where they will not be discarded with pulp or confused with kitchen hardware.
Tribest currently provides manuals and family-specific parts pages for Original, Elite, Pro, and GS5 products, while the Gold manual remains listed. Use those support routes to verify compatibility. The five linked Amazon product destinations were rechecked on September 16, 2026; that check does not guarantee future inventory or accessory availability.
Final twin-gear care checklist
Clean immediately, release pressure as directed, remove parts in order, preserve the matched gear pair, clear pulp before washing, brush gear teeth and the complete screen, clean housing and outlet, keep the base dry, inspect, air-dry, and reassemble from the exact diagram. Never force a housing, substitute a part, assume dishwasher safety, or transfer instructions between Greenstar families.
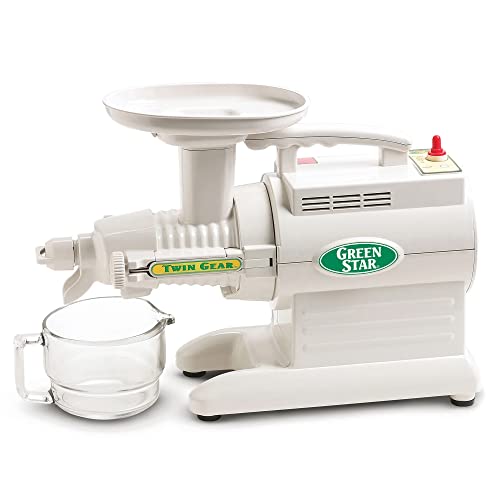
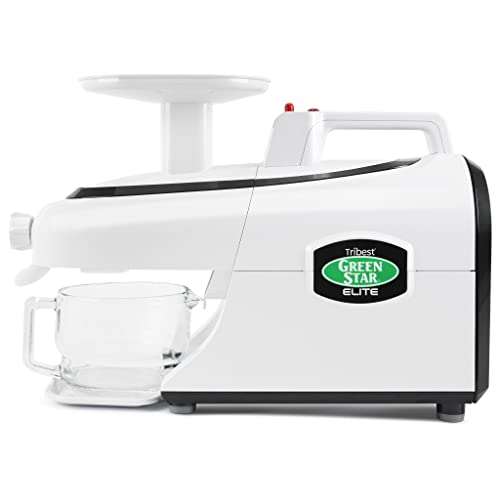
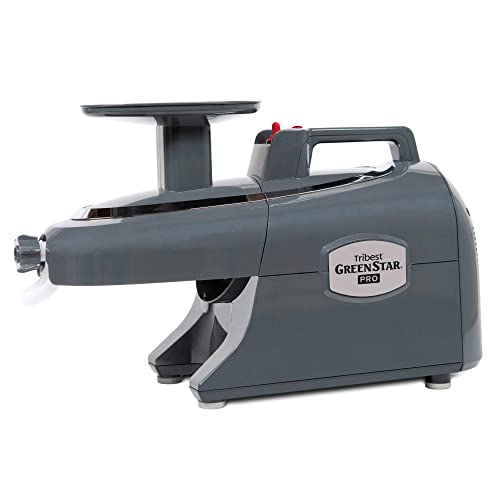
Read the model review and Twin-Gear collection before buying so the cleanup commitment is understood in advance. Greenstar 5 may emphasize an easy-clean housing, while Original, Elite, Pro, and Gold provide different construction and support paths. The best twin-gear machine is the one whose exact assembly and care routine the household can perform correctly after every ordinary batch.
Models relevant to this decision
As an Amazon Associate, we may earn from qualifying purchases.


Frequently asked questions
Do twin gears need to stay as a matched pair?
Yes. Keep the model-specific drive and free-wheel gears together and use only manufacturer-confirmed replacements or compatibility.
Can Greenstar parts be mixed between models?
Do not assume they can. Original, Gold, Elite, Pro, and GS5 parts may differ; verify the exact model and part number.
What part should be cleaned first?
Clear loose pulp, then prioritize the screen before residue dries while also brushing both gears, the housing, pressure outlet, and pulp path.
Are all twin-gear parts dishwasher-safe?
No universal claim is safe. Follow the exact model manual for each part, and keep the motor base, cord, and plug dry.
Why will the housing not close after cleaning?
A gear, screen, seal, or accessory may be misaligned or from the wrong model. Remove the housing and compare the exact manual instead of forcing the lock.
Final verdict
Use the preparation and feeding sequence above for clean and assemble a twin-gear juicer correctly, but let the exact model manual override any general technique. Choose another mechanism if the normal routine repeatedly requires force, unsafe workarounds, or impractical cleanup.