Deep cleaning starts with a symptom, not a schedule myth
A deep clean is useful when ordinary prompt washing no longer clears visible mesh, juice flow changes, pulp accumulates sooner, a basket retains film, or residue remains in accessible channels. It is not a license to disassemble a sealed motor area or to apply a stronger chemical because a calendar says monthly. Frequency depends on the ingredients, model, batch size, water, and completeness of daily care.
Compare the part after normal cleaning under good light. Note blocked openings, pigment, scale-like haze, sticky film, packed frame edges, pulp behind a wiper, or residue at an outlet. A sudden mechanical symptom also requires inspection for damage and correct assembly; cleaning should not be used to explain away a cracked screen, bent basket, failed seal, or abnormal vibration.
Shut down and unload without adding force
Stop feeding when output changes, use the documented control or drain sequence, wait for all motion to stop, and unplug where instructed. Stabilize the juice and pulp vessels before releasing a cap or bowl. Remove the housing, auger, gears, screen, basket, wiper, pressure part, and seals only in the order identified as user serviceable.
Do not use pliers, pry bars, a screwdriver, hot water, impact, or a reverse procedure borrowed from another model to release a packed assembly. If the documented release sequence does not work, manufacturer support is safer than damaging a lock, shaft, seal, or filter. A deep clean begins only after the food path can be opened normally.
Remove bulk residue before it reaches the drain
Empty the pulp container and lift accessible solids with the supplied scraper, brush, or another approved non-damaging tool. Catch strings, seeds, skin fragments, and packed pulp in a sink strainer or disposal route appropriate to the household. Clear the frame and coarse surfaces before directing water through fine openings; otherwise loose material can move from one area into another.
Identify the ingredient pattern. Celery can leave long fibers, greens can cover fine mesh, berries and soft fruit can smear paste, roots can press particles into openings, and citrus can leave sticky film. This observation should inform preparation on the next batch, but it does not change the cleaning chemicals or tools permitted for the part.
Use only the documented soak or wash method
Some manuals allow soaking a removable screen or basket; others emphasize immediate brushing and rinsing. Follow the exact time, temperature, detergent, and part list. Do not assume that a popular vinegar, baking soda, bleach, enzyme, descaler, or dishwasher method is suitable for plastic, silicone, coating, adhesive, metal, or sharp basket surfaces. Mixing household chemicals can create additional hazards.
A dishwasher-safe statement also needs component detail and placement conditions. It may help wash approved pieces but does not guarantee every mesh opening is clear. Remove loose pulp first, protect small parts as directed, and inspect again after the cycle. Keep the powered base, plug, cord, and non-submersible frame out of the sink and dishwasher.
Brush mesh from supported, safe angles
Hold the screen by its sturdy frame or the grip area shown by the maker. Use the supplied or approved soft brush so bristles contact openings without bending the mesh. Work in small sections from both accessible sides, rotating the part instead of forcing a wrist into a sharp or delicate surface. For a centrifugal basket, account for cutting teeth and edges; use the handling method in its instruction book.
Never push a knife, needle, wire, metal pick, or hard abrasive through openings. Enlarged mesh changes separation, scratches can hold residue, and a slip can injure the hand. If an opening will not clear under the approved process, repeat only a permitted soak or wash. Persistent obstruction may mean the part needs model-specific replacement.
Clean the frame, wipers, seals, caps, and outlets
The visible center of a screen is only one part of the flow path. Inspect the outer frame, bottom edge, locking tabs, auger grooves, twin-gear teeth, rotating wipers, pulp-control pieces, juice cap, pressure component, bowl channels, silicone seals, pulp flap, and both outlets. Residue upstream or downstream can recreate the same symptom immediately after the mesh looks clean.
Remove a seal only when the instructions identify it as removable, and note orientation before removal. Do not stretch a flap or force a brush beneath a fixed gasket. A screenless or multi-auger design still needs this full-path inspection even though it does not have a conventional fine metal strainer.
Rinse until inspection—not fragrance—shows completion
Rinse by the allowed method so loosened material and detergent leave the surface. Look through fine mesh toward a light source without flexing the frame. Rotate it and inspect edges where glare can hide residue. Run clean water through approved channels and confirm it exits freely. A perfume or citrus scent is not evidence that a surface is clean, and adding fragrance to a food-contact part can create its own residue.
If a film remains, return to the permitted wash step rather than increasing force. If haze appears to be mineral deposit rather than pulp, use only a manufacturer-approved deposit treatment. The separate stain-and-odor guide explains how to distinguish those observations without prescribing a universal acid or abrasive.
Inspect for damage before drying
Check for broken wires, stretched or separated mesh, cracks, chips, warping, loose frames, bent baskets, damaged cutting teeth, worn wipers, torn seals, and locking tabs that no longer seat. Cleaning cannot restore structural integrity. Do not straighten, glue, sand, trim, enlarge, or patch a food-contact or rotating part unless the manufacturer provides an explicit authorized repair procedure.
A centrifugal basket or rotating filter deserves particular caution because damage can become vibration at operating speed. A cracked slow-juicer screen can alter pressure and leak pulp. Record the exact model and part identifier, then use the maker’s support channel for a verified replacement before another powered test.
Dry every channel before reassembly
Set parts on a clean stable rack with air reaching mesh, frames, grooves, outlets, caps, and seal channels. Avoid nesting a wet screen inside an auger or bowl, and keep small parts together without sealing moisture into a closed container. Follow any manufacturer instruction about towel drying or rack position.
Reassemble only when surfaces and alignment marks can be seen. Install seals in the documented direction, seat the screen or basket without force, check wipers and pressure pieces, and engage locks. If the unit will be stored, decide whether the manual permits assembled storage or whether parts should remain separate and ventilated. Powered-area exposure or unexplained internal moisture goes to support, not a drying guess.
Retest with one controlled, modest recipe
If every part is intact and correctly assembled, use a small familiar quantity prepared to the manual. Keep both outlets visible and change only one prior variable, such as shorter celery pieces or a smaller soft-fruit portion. Do not force the pusher or use a firm ingredient to ram through a restriction. Stop if flow falls, pulp rises, the machine vibrates, or noise, heat, odor, leaking, or a stall appears.
Record whether the deep clean restored normal flow. Repeated rapid buildup with approved produce and correct setup can indicate a worn, mismatched, or damaged component, an incorrect screen or pressure part, or a service issue. Escalation is more useful than repeating aggressive cleaning that may damage the part.
Prevent the next loaded screen
Prepare the sink, brush, and drying area before juicing. Use ingredient sizes, portions, filters, and feed pace from the exact instructions; watch both juice and pulp outputs; and begin normal cleaning promptly after the session. For long fibers, use the documented crosscuts. For soft fruit, use manageable portions and the appropriate screen. Deep cleaning should support daily care, not replace it.
When buying, compare visibility and access: can both sides be inspected, can the approved brush reach the frame, does the pulp path open normally, and are exact replacement filters available? Those practical questions are more durable than a vague self-cleaning or easy-clean label.
Sources and further reading
For product operation, food handling, and other factual claims, we use primary manufacturer, public-health, and clinical guidance as appropriate.
Recommended starting points
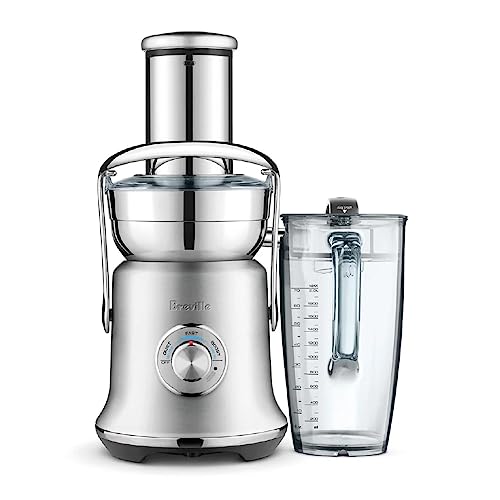
These models represent different mechanisms and ownership tradeoffs for this decision. We do not display prices because Amazon availability and pricing can change.
As an Amazon Associate, we may earn from qualifying purchases.



Frequently asked questions
How often should I deep-clean a juicer screen?
Use visible residue, restricted flow, the normal cleaning result, and the exact manual—not a universal calendar—to decide when a deeper approved clean is needed.
Can I use a metal pick on blocked mesh?
No unless the manufacturer explicitly supplies or approves that tool. Knives, needles, wire, and metal picks can damage mesh and hands.
Does dishwasher-safe mean the screen needs no brushing?
No. Approved dishwasher use does not guarantee every opening is clear. Remove loose pulp and inspect the exact part after washing.
Can I repair a cracked juicer screen?
Do not improvise a repair. Stop using a cracked, separated, bent, warped, or loose filter and find the exact manufacturer-supported replacement.
Does a screenless juicer avoid deep cleaning?
No. It changes the filter path but still leaves an auger or multi-auger, bowl, channels, outlets, seals, caps, and vessels to clean and inspect.
Final verdict
Use the preparation and feeding sequence above for deep-clean a juicer screen, basket, and pulp path, but let the exact model manual override any general technique. Choose another mechanism if the normal routine repeatedly requires force, unsafe workarounds, or impractical cleanup.