Drying is a care stage, not empty waiting time
Washing ends when detergent and loosened residue are rinsed away; safe storage begins only after parts are dry enough for the model’s documented reassembly or storage method. Water can remain beneath screen frames, in auger grooves, inside juice caps, around pulp flaps, under vessel lids, and beside seals. A quick wipe across the largest surface does not reach those paths.
Set up the drying area before juicing so wet components do not compete with dishes or touch a questionable sink surface. Use a stable clean rack or mat with room for the complete food-contact set. Keep powered and non-submersible parts away from splashes. Follow material-specific instructions when a towel or immediate hand drying is required.
Create airflow through the complete food path
Orient bowls, screens, baskets, hoppers, augers, gears, cones, strainers, caps, vessels, and lids so water can drain and air can reach both sides. Open movable caps where the instructions permit. Avoid placing a wet auger inside a bowl or stacking containers rim to rim. Support fine screens by sturdy frames instead of resting weight on mesh or sharp cutting surfaces.
Keep small seals, wipers, pressure pieces, and filters together in a clean ventilated tray. Do not leave them loose near a garbage disposal or under heavy vessels. If a seal is removed for cleaning, retain its orientation reference. Airflow should not require stretching, bending, or balancing a part where it can fall.
Inspect after drying, when residue and damage are visible
Dry parts reveal film, haze, blocked mesh, stress lines, cracks, corrosion, pigment, and warped edges more clearly than wet parts. Hold screens toward light without bending them. Check locking tabs, frames, cutting baskets, auger edges, gear teeth, wipers, silicone pieces, cap threads, outlet flaps, and the interfaces that seat against the drive or bowl.
Separate cosmetic change from functional condition, but do not dismiss a new rough area, swelling, tear, loose frame, bent basket, broken wire, or altered fit. Cleaning does not repair structural damage. A dry inspection before assembly is the moment to stop a questionable component from entering another powered cycle.
Choose assembled or separated storage from the manual
Some households value an appliance that is reassembled and ready; others need components open on a shelf. The correct choice depends on the manufacturer’s guidance, complete dryness, ventilation, dust protection, seal position, and the space. Do not latch a damp food path closed for convenience, and do not force a seal or lock to keep loose parts together.
If storing assembled, confirm every component is dry and correctly seated, containers are empty, and the cord follows the approved arrangement. If storing separated, group model-specific pieces so another appliance’s filter, cap, or seal cannot be substituted later. Leave sharp surfaces protected and delicate mesh free from stacked weight.
Measure the route from storage to the counter
Storage is part of usability. A heavy lever press, tall vertical hopper, long horizontal juicer, large centrifugal jug, and twin-gear accessory set create different lifting and clearance demands. Store the appliance where it can be moved without pulling on the cord, gripping a removable hopper, or carrying a loaded stack of loose parts. Keep the approved brush and vessels close enough to support the complete routine.
Do not store a powered base beneath plumbing leaks, beside a wet sink edge, or where a cord can be pinched. Avoid heat, direct exposure, or a location that conflicts with material and appliance instructions. A cabinet that technically fits can still be a poor choice if the juicer must be tilted by a fragile component.
Protect cleanliness without sealing in moisture
A clean shelf, ventilated cabinet, or suitable cover can reduce dust, but enclosure should follow complete drying. Avoid improvised plastic bags or closed bins around parts that may retain water. Keep food-contact openings away from household chemicals, pet access, raw-food drips, and tools that can scratch them. Clean the storage surface on a reasonable schedule.
Before use, inspect and, if the manual requires, wash or rinse stored food-contact components. A cover does not make the appliance sterile, and long storage does not turn residue harmless. FDA food-handling guidance still begins the session with clean hands, sound washed produce, clean tools, and separation from raw meat, poultry, and seafood.
Know wear, damage, and loss signals
Replacement may be appropriate when a screen cracks or separates, a basket bends, a seal tears or no longer holds its shape, a locking tab breaks, a bowl crazes, a cap leaks despite correct assembly, a wiper wears, a brush deforms, or an exact small part is lost. Performance changes can also prompt inspection, but wet pulp, foam, or low yield alone do not prove one component is defective.
Stop for smoke, sparks, electrical odor, damaged wiring, moisture in powered areas, persistent abnormal heat, severe vibration, grinding, failed interlocks, or load-bearing damage. Those symptoms belong with manufacturer or qualified service support, not a replacement food-contact part selected by appearance.
Capture exact identity before searching for a replacement
Record the model number from the appliance label, not only the family name on the front. Note the part name from the manual, any printed part number, color or regional configuration when relevant, electrical version for powered assemblies, and a description of where it fits. Compare the manufacturer diagram and support listing. Product revisions and sibling models can use pieces that look alike but differ in dimensions, material, locks, magnets, seals, or pressure behavior.
Photographs can help support identify a part but should not overrule the catalog. Keep the receipt, manual, serial details when appropriate, and prior support messages. Confirm whether the needed item is user replaceable; some drive, electrical, bearing, or sealed components require authorized service rather than a mail-order piece.
Prefer verified model-matched parts over look-alikes
Use the manufacturer or a documented authorized channel when possible. Confirm the listing names the exact model and part, not merely a broad brand or diameter. A generic silicone ring, screen, cap, auger, basket, blade, gear, brush, or pitcher should not be installed because it seems to fit. Fit, food-contact suitability, pressure, balance, and safety-lock behavior can depend on small differences.
For a discontinued machine, ask the maker whether a superseding part is approved. Do not sand, drill, trim, shim, glue, or stretch another component to adapt it. If exact support no longer exists, the safe outcome may be retiring the machine rather than creating an unverified hybrid.
Separate retailer terms from manufacturer support
An Amazon offer, manufacturer parts store, retailer return window, warranty, and service policy are different pathways. JuicerPress links to exact verified product destinations but does not sell the model, stock replacement parts, approve compatibility, provide warranty service, or process a return. Read current terms at the responsible seller or manufacturer.
Save written confirmation when support approves a substitute or revised part. Check what is included; a screen may not include its wiper, a bowl may not include seals, and a filter color may identify a pulp setting. Do not infer availability from an old manual or promise that a current part will remain sold indefinitely.
Rebuild and run a controlled post-replacement check
Wash a new user-replaceable food-contact component by its first-use instructions, dry it, and compare it with the manual diagram. Assemble while unplugged, confirm seals, locks, caps, vessels, and alignment, and rotate or move only the elements the manual allows by hand. Never defeat a safety switch to test fit.
If the manufacturer permits operation, begin with a small familiar approved recipe. Watch both output paths and stop for leaking, unexpected resistance, noise, vibration, heat, odor, or failed controls. A new component should restore the documented assembly; it should not require force or a new workaround.
Final care system
Keep four things together: the exact manual, a clean approved brush, a ventilated home for dry parts, and the model and part identifiers needed for support. After every use, move through shutdown, loose-pulp removal, model-approved washing, complete drying, inspection, and documented storage. Before every use, verify dry intact parts and correct assembly.
This routine protects useful life without promising permanence. Seals, screens, baskets, vessels, brushes, and other components can be lost or wear, and product support can change. The durable rule is exact identity: clean the actual part by its instructions, store it without stress or trapped moisture, and replace it only with a component the manufacturer confirms for the actual model.
Sources and further reading
For product operation, food handling, and other factual claims, we use primary manufacturer, public-health, and clinical guidance as appropriate.
Recommended starting points
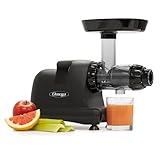
These models represent different mechanisms and ownership tradeoffs for this decision. We do not display prices because Amazon availability and pricing can change.
As an Amazon Associate, we may earn from qualifying purchases.



Frequently asked questions
Should juicer parts be stored assembled?
Follow the exact manual. Assemble only completely dry, correctly seated parts; otherwise store approved pieces separated and ventilated without stressing mesh or seals.
Can I stack wet juicer parts to save space?
No. Nesting can trap water in bowls, screens, caps, channels, lids, and seals. Dry with airflow before storage.
How do I identify the right replacement part?
Use the appliance label’s exact model, the manual’s part name or number, configuration details, and manufacturer confirmation—not appearance alone.
Can a generic seal or screen be used if it fits?
Do not assume so. Similar parts can differ in material, dimensions, locks, balance, pressure, and food-contact suitability.
Does JuicerPress sell or warranty replacement parts?
No. JuicerPress provides editorial guidance and links; it does not sell, ship, warrant, refund, approve compatibility, or process returns.
Final verdict
Use the preparation and feeding sequence above for dry, store, and replace juicer parts, but let the exact model manual override any general technique. Choose another mechanism if the normal routine repeatedly requires force, unsafe workarounds, or impractical cleanup.