Why immediate cleanup matters with citrus
Fresh citrus residue looks mostly liquid, but it carries sugar, fine pulp, membrane, seeds, and rind oils. As moisture evaporates, the remaining film becomes tacky and holds pulp inside strainer holes, beneath pulp controls, around spouts, and along fruit domes. A two-minute response after pouring can prevent a much longer soak-and-brush session later.
Prompt does not mean rushed. Finish the operating sequence in the manual, keep fingers away from a moving cone or loaded press, unplug when required, and allow any moving component to stop. Put the full juice vessel somewhere stable before taking the appliance apart. Cleaning begins with safe shutdown and organized disassembly, not with carrying a dripping assembled machine toward the sink.
Set up a clean-to-dry path before disassembly
Clear one side of the sink for dirty pieces and one ventilated area for washed pieces. Keep a compost or waste bowl nearby for pulp, seeds, and spent rinds. Use the supplied brush or a soft tool approved by the manufacturer, plus the dishwashing product and cloth method the exact instructions permit. This prevents removable parts from being mixed with a knife, heavy pan, or unapproved abrasive.
Take a moment to notice how the cone, strainer, pulp control, dome, spout, and vessel fit together. A quick phone photo can help if the manual recommends several nested pieces, but the manual—not the photo—is the assembly authority. Never force a component that does not release easily; recheck the shutdown and removal sequence before applying pressure.
Clean an electric reamer in layers
On an electric reamer such as the Cuisinart CCJ-500P1 or BLACK+DECKER CJ625, begin only after the cone has stopped and the unit is safely disconnected as instructed. Lift away the cone and pulp-control or strainer assembly in the approved order. Empty seeds and thick pulp into the waste container before running water so the sink drain is not asked to capture the whole batch.
Rinse surfaces from both directions while residue is fresh, then wash according to the model's care directions. Rotate an adjustable pulp component by hand only if the manual permits removal and movement during cleaning. Inspect the center shaft opening, underside of the cone, strainer slots, pour lip, handle, and vessel markings. Keep the powered base out of the sink and wipe it only by the approved method.
Clean a motor-assisted press without loading the arm
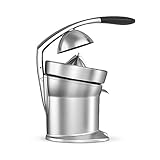
A motor-assisted unit such as the Breville Citrus Press Pro combines a powered cone with an arm, fruit dome, filter, and juice path. Shut down and unplug as directed before removing food-contact pieces. Support the removable dome or cone so it does not drop into the sink, and keep hands away from the hinge or pinch area while wiping the arm and frame.
Clear pulp from the filter before it dries. Wash only the pieces and surfaces identified for that treatment; the motor housing and attached press structure are not sink items. Look under the fruit dome, around the filter rim, at the cone base, and along the spout area where droplets collect. Reinstall nothing until both the removable pieces and wiped frame are dry.
Clean a manual lever press from cup to drip area
A heavy manual press such as the Zulay cast-iron model has no powered base, but that does not make the entire frame automatically submersible or dishwasher-safe. Release pressure, raise the handle in a controlled way, and stabilize it as the instructions describe. Remove the cup, cone, strainer, and drip vessel only where the model permits. Keep fingers clear of the pressing and hinge areas.
Discard pulp and seeds, wash the detachable food-contact parts by their approved method, and wipe the frame promptly so acidic droplets do not remain. Inspect the underside of the pressing cup, the strainer rim, the drip platform, and any seam where juice can travel. Dry the heavy base in place if moving it while wet would create a handling hazard.
Open blocked strainer holes without damaging them
A citrus strainer may hold fine membrane even after a quick rinse. Direct water from the clean side toward the residue side when practical, then use the supplied or approved soft brush. Work across the surface with light strokes instead of stabbing individual holes with a knife, skewer, or metal pick. An improvised sharp tool can distort openings, scratch a finish, or create a hand injury.
If pulp has dried, follow the manufacturer's soaking guidance rather than choosing an aggressive chemical or very hot water on your own. Different plastics, metals, finishes, seals, and markings tolerate different treatment. Persistent blockage after approved cleaning, a cracked strainer, a loose center, or damage that affects fit is a reason to stop using the part and seek an exact replacement.
Treat dishwasher-safe as an exact-part claim
The phrase dishwasher-safe should never be copied from one model to another. BLACK+DECKER identifies dishwasher-safe parts for the CJ625, but even there the exact instructions determine which pieces, rack position, and limitations apply. A removable cone on another product may still be hand-wash only, and a decorative or mechanical frame is not made dishwasher-safe because the strainer detaches.
Check the current manual for every piece. Heat, detergent, and rack movement can affect plastic, measurement marks, small seals, and finish. A powered base never belongs in the dishwasher or sink. When documentation is unclear, choose the conservative approved hand-cleaning path or contact the manufacturer rather than guessing from a retailer bullet or a visually similar model.
Remove sticky film, stains, or mineral haze carefully
A lingering tacky feel often means a thin sugar-and-pulp film remains around a rim, control, spout, or textured surface. Rewash with the manufacturer-approved solution and a soft cloth or brush, reaching the edges from which the part is meant to be accessed. Avoid abrasive pads and strong household chemicals unless the exact care instructions permit them.
Cloudy mineral film can come from water left to dry, while colored residue can come from fruit pigments or rind oils. Neither should prompt an improvised acid, bleach, solvent, or scouring treatment. Follow the product documentation, rinse as directed, and dry promptly. If residue remains in a sealed area that cannot be opened under the instructions, contact the manufacturer instead of prying the appliance apart.
Handle odors by finding trapped residue
A persistent citrus or stale odor usually calls for inspection before fragrance. Check the underside of the cone, strainer edges, pulp-control tracks, vessel lid, spout, dome attachment, cup rim, drip tray, seals, and the drying surface itself. A component stored slightly damp can smell even when its visible face looks clean.
Repeat the approved wash, rinse thoroughly, and allow complete air-drying with pieces separated. Do not use a scented chemical, essential oil, or deodorizing shortcut unless the manufacturer permits it for that food-contact surface. If odor accompanies cracking, discoloration, swelling, electrical smell, leaking, or inaccessible residue, stop using the appliance and consult the maker about service or replacement parts.
Drying and reassembly finish the cleaning job
Water trapped between a cone and strainer, beneath a pulp control, inside a pitcher lid, or around a press cup can create odor and make the next setup unpleasant. Place pieces so air reaches both sides rather than nesting them while wet. Use only a drying method suitable for the material, and keep small components together where they will not fall into the disposal or be mistaken for waste.
Reassemble only when dry and only in the documented order. Confirm that controls move normally, the cone or press cup seats correctly, the vessel aligns, and no cleaning tool remains nearby. Do not use a powered machine if liquid reached the motor housing or cord area; follow manufacturer guidance. A clean appliance that is incorrectly assembled is not ready for operation.
Build a 60-second post-pour habit
The fastest routine begins while the juice is being served. Move spent rinds into the waste bowl, pour or refrigerate the prepared juice according to appropriate food-handling guidance, then return immediately to the appliance. Clear seeds and bulk pulp before they dry. Separate approved parts and start the rinse while residue releases easily.
Keep the cleaning brush, drying mat, waste bowl, and manual in consistent places. This small station reduces searching and discourages the tempting but expensive decision to leave the strainer until later. Time the whole process once—from safe shutdown through dry-area placement—not just the rinse. That honest number is useful when comparing a compact reamer, assisted press, or manual lever for future ownership.
Know when cleaning is no longer the answer
Stop and inspect rather than continue scrubbing when a food-contact part is cracked, warped, deeply scratched, loose, or no longer seats correctly. Also stop for a damaged cord, electrical odor, liquid inside a powered housing, corrosion beyond normal surface residue, a press arm that binds, an unstable base, or a cone that moves abnormally. Cleaning cannot repair structural or electrical damage.
Use the exact model number to find manufacturer support or replacement parts. Similar-looking cones, strainers, seals, and pitchers may not fit safely. JuicerPress links shoppers to verified product destinations and explains workflow, but it does not diagnose an individual machine. When safety or sanitation is uncertain, pause use until the manufacturer or an appropriate qualified professional resolves it.
Final citrus press cleaning checklist
Finish each session in the same order: safe shutdown; stable placement of the filled vessel; controlled removal of approved parts; disposal of rinds, seeds, and loose pulp; prompt model-approved washing; gentle strainer clearing; careful wiping of the base, arm, or frame; complete drying; inspection; and correct reassembly. Keep dishwasher decisions tied to the exact part and exact manual.
When shopping, use this routine as a test. The Cuisinart and BLACK+DECKER follow compact electric-reamer paths, the Breville adds a motor-assisted press arm, and the Zulay adds a heavy manual lever. Open their model reviews, compare how many surfaces the normal batch touches, then return to the Citrus Juicers hub. The best machine is the one whose cleanup can be completed promptly and safely every time.
Models relevant to this decision
As an Amazon Associate, we may earn from qualifying purchases.


Frequently asked questions
Should I clean a citrus juicer after every use?
Yes. Promptly remove pulp, seeds, membrane, and sticky juice by the exact model's approved method, then dry all parts fully before reassembly or storage.
Can citrus-juicer parts go in the dishwasher?
Only the parts explicitly identified as dishwasher-safe for that exact model. Removable does not mean dishwasher-safe, and a powered base must stay out of the sink and dishwasher.
How do I clear pulp from a citrus strainer?
Rinse from both directions when practical and use the supplied or manufacturer-approved soft brush. Do not use knives, picks, or harsh abrasives that can damage openings or hands.
Can I immerse a manual citrus press?
Do not assume the full frame is submersible. Remove and wash only the pieces identified by the manufacturer, and wipe the frame and lever by the approved method.
What if a citrus press still smells after washing?
Inspect hidden edges and drying areas for trapped residue, repeat the approved wash, and air-dry separated parts completely. Stop and contact the manufacturer if odor accompanies damage, electrical smell, leaking, or inaccessible contamination.
Final verdict
Use the preparation and feeding sequence above for clean a citrus press, but let the exact model manual override any general technique. Choose another mechanism if the normal routine repeatedly requires force, unsafe workarounds, or impractical cleanup.