A jam and a locked assembly are not the same problem
A motor may stop because produce is wedged in the feed path, pulp has packed against the outlet, an auger is wrapped with fiber, an automatic protection cycle has engaged, or the machine was assembled outside its lock marks. After a batch, a housing can also feel stuck because compacted material holds parts together even though the motor was never overloaded. Note what happened immediately before the stop.
Release the pusher and controls; do not add pressure. A hum, click, automatic reversal, or silent stop can have model-specific meanings. Use the exact troubleshooting table rather than assigning a universal diagnosis from sound alone.
Use reverse only as documented
Many slow juicers provide a reverse function, but the operating sequence differs. Some instructions call for releasing the forward control, waiting, then holding reverse briefly. A model with pressure detection may change direction automatically. Other mechanisms have no reverse procedure. Follow the exact timing and repetition limit.
Do not flick rapidly between directions or hold a control indefinitely. If reverse does not restore normal movement, stop. A repeated cycle can churn a packed mass without opening the pulp exit. Centrifugal baskets, citrus reamers, and manual presses require their own model-specific response.
Unload safely instead of forcing the housing
Switch off, unplug, and wait for every moving part to stop. Release a juice cap, pressure control, or front housing only as the manual directs. Support the bowl or drum and turn in the documented direction. Do not use pliers, pry bars, knife blades, impact, heat, or an extension for leverage. A safety lock or food-contact part can crack under those methods.
If the assembly cannot be released through the stated procedure, contact support. It is better to preserve a packed but intact machine than turn an ordinary jam into a damaged lock, shaft, seal, or screen.
Find the ingredient pattern behind the stall
Long celery fibers can wrap; leafy bundles can bridge; very soft fruit can create paste; dense root chunks can load the auger suddenly; pits and hard excluded material can create damage. A self-feeding hopper can still be overfilled or packed so tightly that pieces do not settle normally. Review the ingredient, cut size, amount, order, and speed at the moment the machine stopped.
For the next approved test, use a smaller portion and one familiar ingredient. Shorten fibers across their length, portion leaves, cut dense produce within the instructions, and avoid loading a full soft-fruit mass. Do not use another ingredient as a ram once flow has stopped.
Clean, inspect, and align before restarting
Clear the auger grooves or gear teeth, screen, bowl channels, pressure parts, seals, wipers, pulp flap, outlet, and feed throat with the supplied or approved tools. Inspect for cracks, chips, distortion, embedded hard material, and an exact replacement part installed in the wrong orientation. Dry alignment marks enough to see them during reassembly.
Test only if components are undamaged and the manual’s checks are satisfied. Place containers correctly, start empty if instructed, and add a modest prepared amount. Stop immediately if the sound, motion, smell, temperature, or leak returns.
Escalate repeated stalls and electrical symptoms
A jam caused by one badly prepared ingredient is different from repeated stopping with correct assembly and normal loads. Persistent faults can involve a worn gear, damaged auger, motor protection, control problem, wrong part, or other service issue. Smoke, electrical odor, damaged cord, unusual heat, sparks, grinding, leaking toward the base, or an abnormal safety interlock ends home troubleshooting.
Record the exact model, configuration, ingredient, quantity, and sequence, then use the manufacturer support channel. Do not bypass a lock or continue on the assumption that a higher-wattage replacement is the only answer. Feed-path design and documented operating limits matter more than one motor number.
A repeatable buying checklist: a stuck auger
Unplug before disassembly, keep the motor base dry, and use only the inspection and cleaning steps permitted by the manufacturer. Put the cutting board, produce bowl, juice cup, and pulp container in their working positions before starting. This exposes whether the advertised footprint reflects the actual space required for loading a stuck auger, lid movement, container removal, and cleanup.
For a stuck auger, remove pits and hard inedible pieces whenever required, inspect produce, and keep prepared pieces within the manufacturer's limits. Do not use a wide chute as permission to ignore awkward shapes, dense roots, long fibers, or ingredients excluded by the manual.
A steady feed is usually more productive than force. Let the mechanism clear each portion of a stuck auger, watch the pulp exit, and pause according to the instructions when the bowl or filter screen needs attention.
How to use the recommendation responsibly: a stuck auger
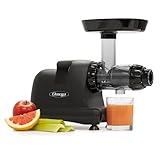
Omega All-in-One, Omega Hands-Free, and Breville Juice Fountain Plus represent different routes into this decision. Examine them by the job each one is meant to do with a stuck auger, not by counting how many features appear in the listing. The leading pick should win the main habit; an alternative should exist because a different buyer priority changes the answer.
For a stuck auger, check whether the machine is horizontal or vertical, actively fed or hopper-based, general-purpose or specialized, compact or batch-oriented. Then evaluate food-contact part count, pulp capacity, container placement, and mesh access.
These a stuck auger recommendations are curated shopping starting points, not claims that every household will reach the same conclusion. Verify the current Amazon listing and manufacturer documentation because model variants, included accessories, and availability can change.
Build a decision table before opening Amazon: a stuck auger
Texture is influenced by screen design, pulp-control settings, ingredient condition, feeding pace, and the mixture in the recipe. A smoother glass may require a finer screen or secondary straining, while a shopper who likes body may prefer more pulp. Neither result is automatically better.
Apparent yield should also be interpreted carefully. Wet pulp can point to ingredient prep, pace, assembly, screen condition, produce moisture, or mechanism fit; it does not prove a universal percentage difference after one session.
For a stuck auger, set an expectation for texture before buying. That preference can be more valuable than chasing a broad "high yield" claim that was measured with different produce and conditions.
Plan the first thirty days of use: a stuck auger
Cleanup after a stuck auger begins as soon as the final ingredient clears. Unplug when required, move approved removable parts to the sink, discard loose pulp, and rinse before residue dries. The filter screen, pulp outlet, juice cap, seals, and narrow channels deserve particular attention.
For a a stuck auger habit, use only the brush, washing method, dishwasher placement, and disassembly steps approved for the model. Keep the motor base dry and do not remove seals or components the manual does not identify as user-removable.
For a stuck auger, consider staining, fine fibers, sticky citrus residue, or thick pulp before choosing. A model that is slightly slower but easier to inspect and reassemble can create the more reliable daily habit.
The decision this page should settle: a stuck auger
Measure more than stored width. Include total height, cabinet clearance, hopper or lid swing, the space needed to feed produce, pulp-bin removal, the path to the sink, and room for removable components to air-dry. A narrow vertical body can still be tall, while a horizontal auger can consume work surface length.
Noise also has a context. Early mornings, apartments, children, home offices, and shared kitchens can make a calmer mechanism more valuable than maximum speed. Stability matters as much as sound; place the appliance on the surface and with the clearances specified by the manufacturer.
The best location keeps the appliance accessible without crowding ingredient prep. Appliances that are difficult to retrieve or rebuild after washing are less likely to support the intended process.
How the ingredient or routine changes the machine choice: a stuck auger
The most common mistake for a stuck auger is choosing by one appealing attribute—brand, wattage, chute size, low-speed language, finish, or accessory count—before confirming ingredient fit. Another is treating "cold" in a product name as proof of a masticating mechanism. Read the actual operating description.
When comparing machines for a stuck auger, do not assume every removable part is dishwasher-safe, every wide opening accepts every whole fruit, or every heavy model is rated for continuous commercial service. Those claims require model-specific confirmation.
Finally, avoid buying for an imaginary a stuck auger routine. Base the pick on produce already purchased, servings already consumed, and cleanup time the household will realistically accept.
Mechanism and feed-path fit: a stuck auger
A different juicer type wins when the main job changes. A dedicated citrus machine can be simpler than an all-produce juicer for daily orange juice. A centrifugal machine can be more practical for fast apples and carrots. A slow auger can be the better fit for greens, fibrous stalks, mixed recipes, and quieter operation.
For a stuck auger, identify the attribute that would cause the recommendation to fail: excessive prep, poor ingredient compatibility, large working space, heavy food-contact pieces, specialized use, or a washing path that exceeds the available time.
When that failure appears, choose the alternative mechanism rather than trying to compensate with accessories or technique. The best-fitting category decision is more important than the final model badge.
Preparation before the motor or press starts: a stuck auger
Use a written a stuck auger checklist before opening Amazon. Record the most frequent ingredient, companion ingredients, normal serving count, desired texture, maximum working width and height, acceptable noise, sink space, and whether the model will remain on the counter.
For each a stuck auger candidate, confirm mechanism, chute or hopper design, pulp exit, container arrangement, removable parts, filter surface access, stated ingredient limitations, and replacement-part path. Note the single strongest advantage and the most important tradeoff.
Remove any product that fails a non-negotiable a stuck auger requirement. Between the finalists, choose the one whose advantage supports the most frequent behavior rather than the occasional edge case.
Comparing the practical shortlist: a stuck auger
JuicerPress uses verified product-level Amazon links and explains who each a stuck auger recommendation is designed to serve. It does not display prices because availability and pricing change, and it does not imply that products are sold, shipped, warranted, or returned by JuicerPress.
For a stuck auger, use Amazon to confirm the current model, included accessories, seller information, and listing details. Use the manufacturer manual for produce preparation, assembly, operating limits, washing, and safety. The editorial comparison is an aid to a decision, not a substitute for either source.
As the a stuck auger session pattern develops, reassess the original priorities. The best long-term result is a model that continues to fit the ingredients, space, and washing behavior—not merely the one that looked most impressive on purchase day.
Texture, pulp, foam, and yield expectations: a stuck auger
Create a simple decision table with one row for each finalist and columns for the main ingredient, companion ingredients, servings, feed style, preparation minutes, washing minutes, operating dimensions, storage, noise, and the clearest compromise. Use pass or fail for requirements and reserve preference scores for true ties.
Place Omega All-in-One, Omega Hands-Free, and Breville Juice Fountain Plus into that table using verified listing and manufacturer information. Do not award points for an accessory or capability that the household does not plan to use.
This structure prevents a promotional headline from outweighing the practical process. The model that passes every non-negotiable and wins the most frequent task is the strongest starting selection.
Cleanup and reassembly after the final glass: a stuck auger
Plan the first month around a small number of repeatable sessions. During week one, learn assembly and cleaning with a simple ingredient list. During week two, test the normal portion size. During week three, add the secondary ingredients that justified the mechanism. During week four, decide whether storage and cleanup process still fit.
Record ingredient prep time, feeding interruptions, texture, visible pulp condition, rinse time, and any instruction that required another look at the manual. Change only one controllable factor between sessions.
A thirty-day plan turns the buying criteria into evidence about household fit. It also discourages unsafe improvisation or unnecessary replacement when the real issue is unfamiliar assembly, ingredient prep, or feed pace.
Sources and further reading
Models relevant to this decision
As an Amazon Associate, we may earn from qualifying purchases.


Frequently asked questions
How long should I hold reverse?
Use only the duration and sequence in the exact model manual. There is no universal reverse interval for every juicer.
Can I pry open a stuck juicer chamber?
No. Follow the documented release sequence. If it will not open, contact support rather than damaging a lock, seal, shaft, or screen.
Can a full pulp outlet jam the auger?
Yes, outlet restriction can create resistance upstream. After shutdown, inspect the complete pulp path rather than only the feed chute.
When does a jam require service?
Use service for repeated stalls with correct use, a damaged part, abnormal lock behavior, grinding, smoke, electrical odor, persistent heat, damaged wiring, or leakage near electrical areas.
Final verdict
For why is my juicer jammed or the auger stuck?, begin with the safest reversible check described above, change one factor at a time, and stop for model-specific support if the symptom involves damage, leaking, unusual odor, or persistent mechanical trouble.