Start with the exact manual
Model families can share a brand name while using different bowls, strainers, caps, hoppers, and locking directions. Match the rating-label model number to the manual and place every clean part on a dry towel.
A video for a similar machine may visualize the process, but it cannot replace the correct seal placement and safety sequence.
Identify the functional parts
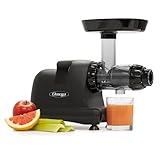
Most slow juicers have a powered base, processing bowl, screen, auger, lid or hopper, pusher, juice cup, and pulp container. Some add a wiper, juice cap, removable pulp seal, or multiple screens.
Learn the juice path and pulp path. Understanding what each piece does makes assembly and troubleshooting far easier.
Seat seals, bowl, screen and auger
Install only the seals shown in the manual. A missing, folded, or misplaced plug can lead to leaking or trapped pulp. Align the bowl, seat the screen and wiper, then lower the auger using the permitted motion.
The auger should settle without aggressive pressure. If the lid will not lock, stop and inspect the pieces underneath rather than forcing tabs.
Lock the hopper and perform a dry check
Follow the marked direction to lock the lid, place the juice and pulp containers under the correct outlets, and set the juice cap as instructed. Confirm the machine is stable and the cord is clear.
Many juicers will not run unless the interlock is fully engaged. If it does not start, unplug and recheck alignment instead of defeating the safety system.
When parts will not fit
Do not use tools, oil, excessive pressure, or components from another model. Check for an upside-down screen, an auger that has not seated, a misplaced seal, dried pulp, or the wrong alignment mark.
If a clean, correctly ordered assembly still will not lock, contact the manufacturer with the model number and part details.
Practice the reverse sequence too
Assembly becomes reliable when disassembly is equally familiar. After a dry practice build, unlock and remove each part in the instructed order, noting where liquid or pulp would remain after use. This reveals which container should move first and which seal needs inspection.
Never twist a locked component harder because juice residue creates resistance. Rinse or clear it using the approved method, and keep the powered base dry throughout the process.
Use alignment marks as checkpoints
Many bowls, screens, and hoppers include dots, arrows, tabs, or lock icons. Pause at each mark instead of treating only the final lid position as proof of correct assembly. A lid can fail to reach its lock because a lower piece is slightly high or rotated.
Good assembly feels repeatable rather than forceful. If the same step repeatedly causes trouble, compare the part orientation with the diagram and inspect for retained pulp or a damaged tab.
First-use setup after assembly
Once the dry build is understood, wash the approved food-contact parts, let them drain, and rebuild on a stable counter with both containers in place. Prepare a small, simple batch within the model guidance rather than testing every ingredient at once.
Observe the juice outlet, pulp outlet, cap, seals, sound, and interlock. A first session is for learning normal behavior. Stop and consult support if leaking, grinding, or repeated stalls suggest the assembly is not operating normally.
Models relevant to this decision
As an Amazon Associate, we may earn from qualifying purchases.



Frequently asked questions
Why will my juicer not turn on after assembly?
A safety interlock may not be engaged. Unplug and recheck the bowl, screen, auger, hopper, and locking marks.
Should I force the auger down?
No. A correctly aligned auger should seat using the method in the manual.
Can I substitute a missing seal?
No. Obtain the correct model-specific part from the manufacturer or an authorized source.
Final verdict
Use the preparation and feeding sequence above for assemble a cold press juicer safely, but let the exact model manual override any general technique. Choose another mechanism if the normal routine repeatedly requires force, unsafe workarounds, or impractical cleanup.